The integration of AMSI (Antimalware Scan Interface), which was intended to provide better protection in Exchange 2016 CU21 and Exchange 2019 CU10, is unfortunately now causing serious problems when Exchange is used with various antivirus programs.
These include extremely long loading times when opening applications and when using Outlook, delays in sending emails and even a complete loss of connection to the Exchange server.
One thing is clear: you cannot work like this.
Fortunately, some antivirus vendors were prepared and offer an option to disable AMSI. Here, we will show you how to resolve these problems using Sophos, McAfee, Bitdefender and Kaspersky as examples.
We will also explain how to disable this feature by modifying the Exchange server's web.config file.
Sophos
There are two ways to disable AMSI in Sophos. You can do it directly in the application on the client, but this becomes very impractical when dealing with multiple installations. Alternatively, you can do it centrally through the Sophos Central management interface.

1. On the endpoint: Even if you disable AMSI on the endpoint, you will still need to use Sophos Central. First, you need to disable Tamper Protection for the relevant device in Sophos Central. To do this, simply scroll down to Tamper Protection on the overview page and click "View password details". Copy the password for use in the next step.
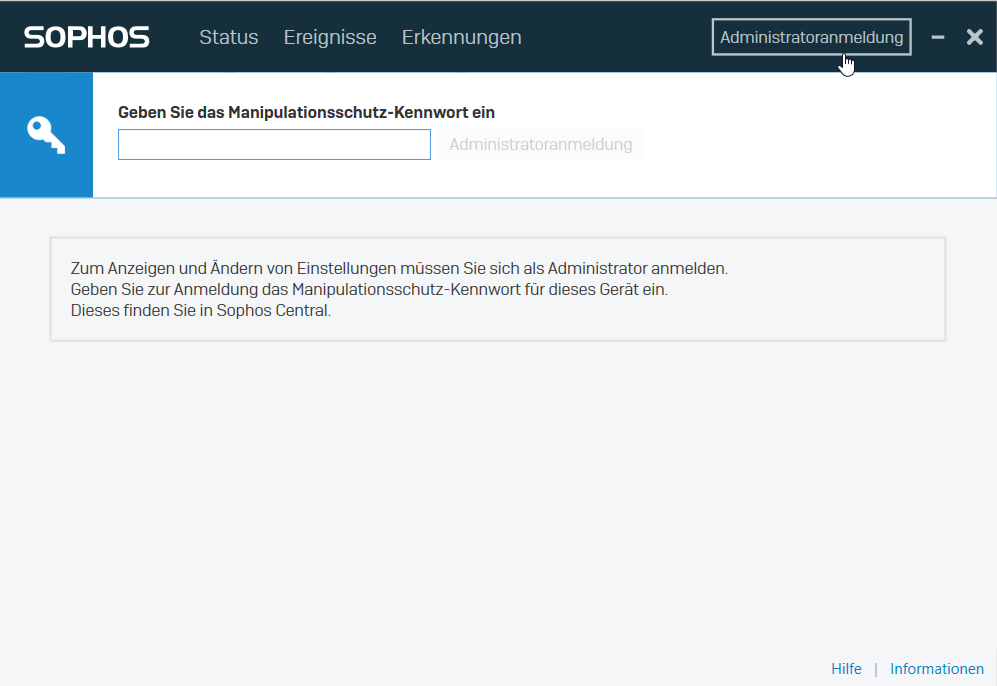
Then, on the PC where Sophos is installed, click the Sophos icon in the notification area at the bottom right of the taskbar. Under Administrator sign-in, you can then enter the password you copied from Sophos Central.
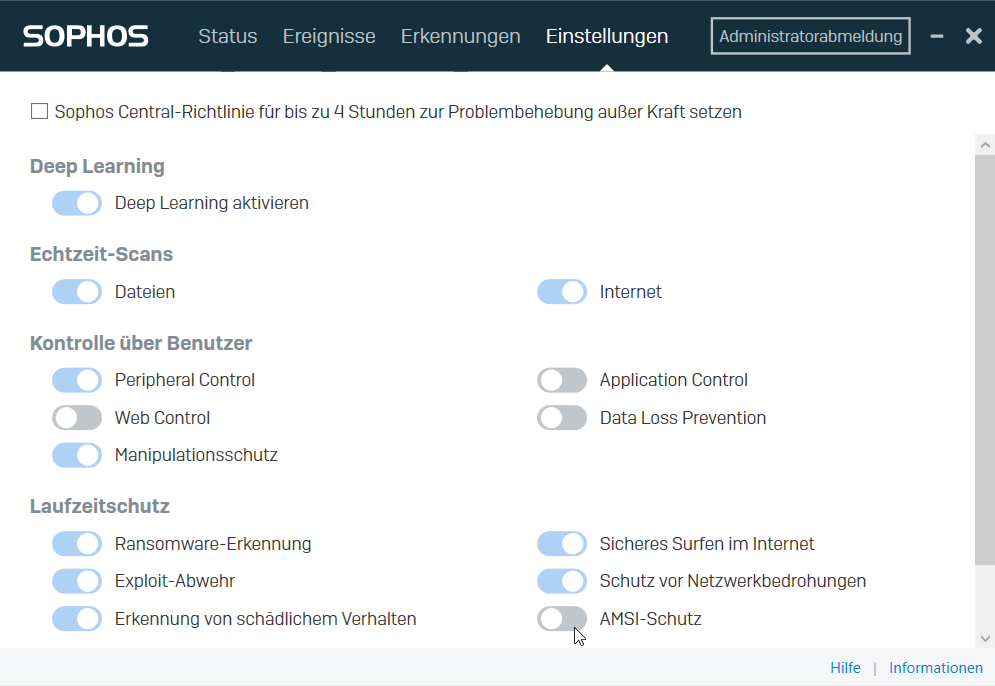
You can now disable AMSI protection under "Settings" in the bottom right-hand corner.
(In Sophos Central, under "Server -> Policies -> Threat Protection", disable "AMSI Protection (Windows)".)
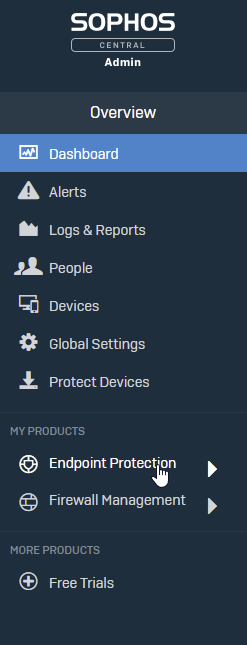
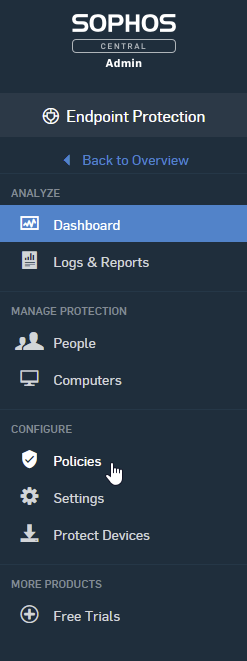
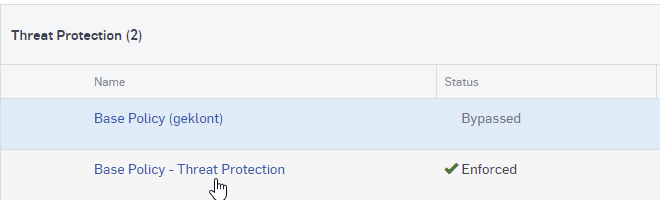
Once you have done this, simply scroll down to "AMSI Protection" and disable it.
Once you have done this, simply scroll down to "AMSI Protection" and disable it.

Now all you need to do is click "Save" in the top right-hand corner, and you can get back to using Outlook as normal.
McAfee
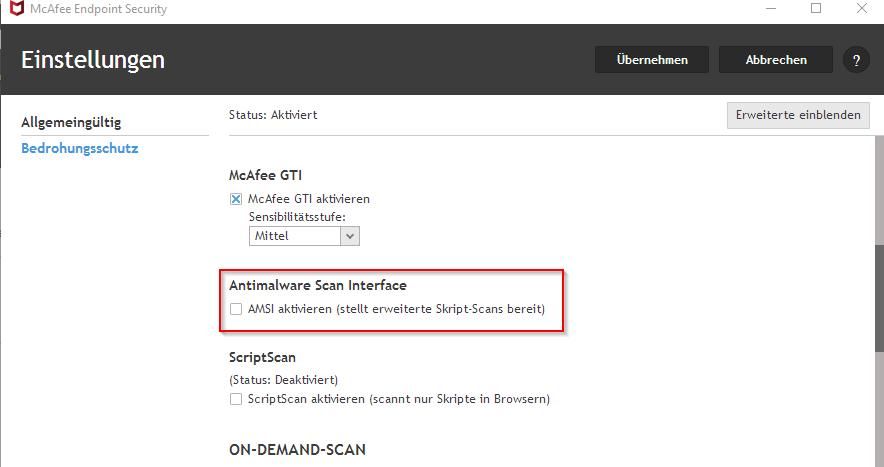
McAfee Endpoint Security has also been updated with an option under Settings that lets you disable AMSI protection.
Bitdefender
With Bitdefender, these changes must be made via Gravityzone, as there is no dedicated AMSI option. You can only disable malware protection entirely for on-access scanning, execution (Advanced Thread Control) and Advanced Exploit Control. We recommend creating a separate Exchange profile for the server and disabling protection in that profile until a fix is available.
Kaspersky
Enabling and disabling "AMSI Protection"
"AMSI Protection" is enabled by default.
To enable or disable "AMSI Protection", proceed as follows:
- At the bottom of the main application window, click the button
 .
- In the application settings window, select Protection → Essential Threat Protection → AMSI Protection.
- Use the AMSI Protection toggle to enable or disable the component.
- Save your changes.
Source: https://support.kaspersky.com/KESWin/11.5.0/de-DE/174820.htm
Directly on Exchange
Finally, you can also disable AMSI by directly editing the web.config files for MAPIoverHTTP and RPCoverHTTP on the server where Exchange is installed. This approach is no longer recommended, so only use the methods described above or the PowerShell method below.
To use PowerShell, open the Exchange Management Shell (PowerShell with Exchange extensions)
[PS] C:\PowerShell> New-SettingOverride -Name "DisablingAMSIScan" -Component Cafe -Section HttpRequestFiltering -Parameters ("Enabled=False") -Reason "Testing"
[PS] C:\PowerShell> Get-ExchangeDiagnosticInfo -Process Microsoft.Exchange.Directory.TopologyService -Component VariantConfiguration -Argument Refresh
[PS] C:\PowerShell> Restart-Service -Name W3SVC, WAS -Force
This applies the settings and restarts IIS, resolving the problem until a permanent fix is available.
Source: https://support.sophos.com/support/s/article/KB-000042460
Source: https://techcommunity.microsoft.com/t5/exchange-team-blog/more-about-amsi-integration-with-exchange-server/ba-p/2572371